
DTF Printing on Hard Surfaces: Techniques and Tips
Ever wondered if you can plaster a vibrant design onto a wood
en sign or a ceramic mug just like a T-shirt? You can – with a few tricks up your sleeve. I remember the first time I tried DTF (direct-to-film) on a wooden board. The result wasn’t perfect at first (cue mild panic), but with some sanding and the right gear, it turned out surprisingly well. In this post, we’ll dive into DTF Printing on Hard Surfaces: Techniques and
Tips – from the basics to pro tricks. We’ll cover what tools you need, how to prep different materials, and even the exact heat press settings for that favorite

cotton tee. (Yes, even fabric aficionados will find answers here.) Let’s kick off with why DTF might be your new secret weapon for printing on things you never thought possible.
DTF Printing on Hard Surfaces: Techniques and Tips for Beginners
DTF (Direct-to-Film) printing traditionally meant t-shirts and hoodies. But the techniques and tips for applying DTF to hard, non-fabric items are evolving fast. In short, yes – you can use DTF on materials like wood, metal, glass, and more. The trick is understanding how it’s different from textile printing. Unlike sublimation or direct-to-garment, DTF uses a sticky adhesive powder baked onto a printed film. That adhesive wants something to grab onto. Porous or prepared surfaces are ideal.
-
Wood: A sanded or pre-painted wood panel can take DTF transfers directly. Smooth, semi-porous woods (like MDF or pine, after sanding) are surprisingly cooperative.
-
Metal and Plastics: These non-porous surfaces often need a good wipe-down and maybe a primer. A lightly sanded or etched metal sheet can accept a DTF decal with careful heat pressing.
-
Ceramic and Glass: Think mugs, tiles, or bottles. These need special care (more on that below), but in principle DTF inks and adhesives can stick – especially if you use a mug press or consider UV-cured DTF stickers.
Specialist printers and manufacturers agree: DTF is versatile. For example, DTF PrintCo lists wood, canvas, glass, and ceramics among viable DTF substrates. In practice, that means custom wooden signs, personalized mugs, and even decorated phone cases are on the table.
As a quick reality check: if you want a guaranteed bond on a hard surface, remember that UV-activated DTF (using UV-curable inks and adhesives) is engineered for truly rigid, non-textile materials. But even without UV tech, many makers are getting creative with classic DTF. The key is preparation and patience. Let’s look at the gear you’ll need.
Essential Equipment and Materials for DTF on Hard Surfaces
Building your toolkit is step one. Here’s a checklist of what you need – and why I swear by each item:
-
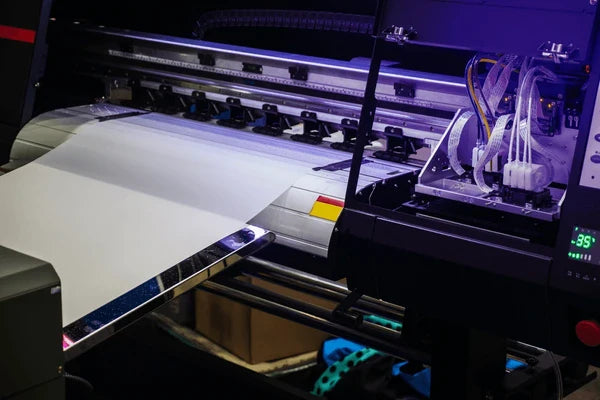
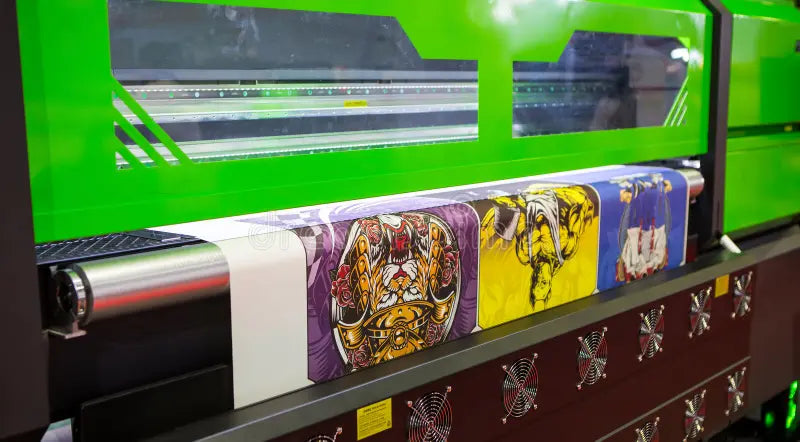
Dedicated DTF Printer: You want a machine built for the job. Converting a regular inkjet is a short-term hack at best. For reliable prints, I recommend a model like the STS XPD-724 DTF Printer. This Mutoh-based, all-in-one printer handles ink, film, and even your adhesive powder elegantly. (In fact, the Product Review: Mutoh STS XPD-724 DTF Printer is a must-read if you’re shopping for gear.)
-
High-Quality DTF Inks: Color vibrancy and durability depend on good ink. I’ve had great results using Mimaki DTF 440ml Ink Cartridges. These inks are formulated for top-notch color reproduction on transfers, especially useful when your art pops off wood grain or ceramic glaze.
-
DTF Transfer Film & Adhesive Powder: This is the bread and butter. You’ll print your design onto special PET film, then apply a water-soluble adhesive powder. Make sure the powder matches your film and ink type. Shake off excess powder and cure it in a drying oven to embed the adhesive.
-
Heat Press (or Transfer Press): Since DTF is a heat-transfer process, a good press is non-negotiable. For flat hard items, a flat heat press works. If you plan on mugs or cups, get a mug press (a cylindrical heat press designed for drinkware). I use a mid-sized heat press with consistent pressure; cheap irons just don’t cut it. A Teflon sheet or silicone pad is handy to protect your prints and spread heat evenly.
-
Surface Prep Tools: Sandpaper (120–320 grit) for smoothing wood, mild cleaner (like isopropyl alcohol) for degreasing, and a lint roller for dust. These simple supplies make a world of difference. A tack cloth or silicone roller can help remove stray dust before pressing.
In practice, I gather all these on my workbench: the printer on one side, a stack of transfer films, jar of adhesive powder, pressing station on another. Lint rollers, tape, and scissors are within arm’s reach. You might also consider UV-curing stations if you dabble in UV DTF stickers. But even with basic gear, you’re ready to start.
Pro Tip: Invest in a calibration or test pattern. Before committing a design to an expensive surface, print a small test transfer. This helps dial in color and alignment, especially on tricky materials.
Can you use DTF on hard surfaces?
Absolutely – with some caveats. The short answer is yes, DTF transfers can adhere to many hard substrates, but each material behaves differently. Here’s a breakdown:
-
Wood: This is one of the more DTF-friendly hard surfaces. As long as the wood is clean and smooth, the adhesive in the DTF film grips nicely. A pre-painted or sealed wood board works even better. XTool, a maker-community brand, notes that bare, uncoated wood still takes DTF transfers (since the adhesive powder bonds directly to the wood fibers). My own experience: sand the wood to 220 grit and wipe off dust before pressing. Use medium pressure (not rock hard, not too soft) for about 15–20 seconds at the recommended temperature. The result is usually a vividly printed design that follows the grain texture.
-
Metals & Plastics: Metals (like aluminum sheets or steel plates) can be DTF’d, especially if you sand or scuff the surface first. A quick sandpaper or fine abrasive pad gives the adhesive something to latch onto. Plastics are similar – printable plastics (like PVC signs) often require surface prep or even a light primer. I once printed on an acrylic sheet by lightly scuffing it and cleaning it first; the transfer stuck but I still added a clear coat for durability. In all cases, ensure your press temperature isn’t too high for plastic. (PET films say 150–170℃, so tweak carefully.)
-
Glass & Ceramics: This is trickier, but doable. Straight glass panes or ceramic tiles usually need a primer spray (like a ceramic coating or roughening agent) to help the DTF adhesive stick. However, for mugs, cups, and curved items, the secret is a mug press. An XTool guide even calls ceramic mugs and cups “popular items for DTF printing.” The process: Clean the mug thoroughly (grease or fingerprints are your enemy), wrap the transfer film around the mug, then clamp it in a mug press at about 150–160°C for maybe 30 seconds (every press is different, so test!). Peel the film while it’s hot or warm (check if your film is hot- or cold-peel). Note: since ceramics aren’t porous, I usually add a quick spray of sealant after pressing, especially if I plan to wash the mug.
One important caveat: Durability. Standard DTF prints are great on fabric (survive many washes), but on hard surfaces they can scratch or fade if untreated. For truly long-lasting prints on things like kitchenware or outdoor signs, consider UV-curable DTF methods or an over-laminating clear coat.
In summary, use DTF on hard goods like wood signs, custom drinkware, or promo items – but expect to experiment a bit. Clean and prepare, press at the right temp, and don’t skimp on adhesion. These techniques and tips ensure your hard-surface DTF looks as crisp as a T-shirt print.
Preparing Hard Surfaces for DTF Printing
Before hitting the press, prep is everything. Here’s how I get different surfaces ready:
-
Clean Thoroughly: Oils, dust, and residues repel adhesives. For glass or ceramic, wipe with isopropyl alcohol or mild soap. XTool’s guide recommends a “mild cleaner” to remove any contaminants. For plastics and metals, a good degrease is key. Always let surfaces dry fully.
-
Sand or Prime (if needed): Soft woods (pine, MDF) often benefit from a light sanding. Go from 120 grit (to remove bumps) to 220 grit (for smoothness). This opens the pores just enough. Even hardwoods like oak with prominent grain may need a sanding or a coat of clear primer to avoid blotching. If you’re working with naturally “oily” wood like teak, a primer sealant is strongly recommended – these woods tend to repel adhesives. For plastics or metals, use very fine sandpaper (like 400 grit) just to dull the surface; too much sanding can warp plastic.
-
Protect Adjacent Areas: Tape off sections where you don’t want the print. A high-temperature tape (like Kapton tape) can hold your film in place without residue. Also lay down a Teflon or silicone mat under the work area of your press to protect the item (especially if the item is small or oddly shaped).
-
Test for Heat Tolerance: Some hard materials can’t take high heat. Always check a scrap piece or a hidden section first. For example, if you’re printing on a painted surface, ensure the paint won’t blister at 160°C. If it might, you’ll have to lower the temp and increase press time slightly.
After prep, position the DTF transfer on the item. Make sure it’s perfectly aligned – once you press, you can’t adjust it! Pinching the edges or using a heat-resistant glove to hold it in place can help, then clamp with the press.
What temperature to press DTF on 100% cotton?
If you’re also doing some fabric work (or just wondering about our tee shirt), here’s the scoop. For 100% cotton, most DTF transfer experts recommend a heat press setting of 320–350°F (160–177°C). Cotton fibers can take the higher end of the temperature range because they withstand heat well. A good rule of thumb: I usually press at around 340°F (170°C) for about 12–15 seconds, with medium to firm pressure.
EazyDTF suggests 320–350°F for cotton transfers, and many printers agree that hitting around 350°F gives the adhesive time to fully activate on cotton. Remember to cover with a Teflon sheet or parchment paper to protect the garment. And always test: fabrics can vary (especially if the cotton is blended or pre-treated). If you see scorching or incomplete adhesion, tweak down or up in 5° increments.
Quick Tip: Pre-press the cotton garment for 2–3 seconds to remove moisture and wrinkles before applying the transfer. This little extra step pays off with crisper edges and better adhesion.
Will DTF stick to ceramic?
Ceramic can be a tough customer. A plain glazed ceramic tile or plate will receive a DTF transfer under heat and pressure, but the bond may not be as permanent as on fabric. Here's what to expect:
-
Flat Ceramic Tiles: If your tile is going to sit on a shelf or wall (not wash often), you can sandwich the transfer between it and a Teflon sheet, then press at about 150–160°C. Peel hot (if the film allows) or cold depending on your transfer instructions. The result will look great for display. However, without a protective overcoat, expect some scratching if used heavy-duty.
-
Mugs and Cups: As xTool notes, “Ceramic items… are popular for DTF printing.” The trick is using a mug press, which wraps heat evenly around the curve. Clean your mug, wrap the transfer film tightly, and clamp. Check if your ink/film is hot-peel or cold-peel – that will change when you remove the film. The design generally comes out vivid. Be warned: these are typically hand-wash only unless you add a glaze.
-
Adhesion Aids: Some creators spray a very light coat of glue or primer on ceramics before pressing to help the DTF stick better. Others print first on DTF sticker vinyl (with UV inks) and then heat-apply. In fact, industry experts highlight that UV DTF printing (which uses UV-curable inks and no heat press) is often recommended for non-porous goods. UV DTF decals resist washing and weathering far better. So if you need a dishwasher-safe mug or a weatherproof sign, consider UV DTF as an alternative technique.
In practice, I use DTF on ceramic mainly for novelty gifts (like photo mugs) where hand-washing is fine. For something like an outdoor ceramic sign, I’d use a clear epoxy coating or UV DTF. But to answer bluntly: Yes, DTF will stick to ceramic under heat and pressure, but treat it like a delicate sticker – handle with care. Always align carefully and consider post-press sealing if longevity is important.
Troubleshooting and Pro Tips
-
Ink and Adhesive Quality: If your print looks dull on a hard surface, check your inks. Some surface materials (like very dark wood or shiny plastic) can mute colors. Using high-opacity white ink undercolors (on film) can boost vibrancy. This is why I suggested Mimaki DTF inks earlier – they’re known for opacity and color fastness on transfers.
-
Pressure is Key: Many adhesion failures come from uneven pressure. A common rookie mistake is pressing a mug in a regular flat press (which leaves gaps), or over-tightening and tearing the film. Invest in adjustable pressure or specialized fixtures. For flat hard items, distribute a bit of weight (like sandbags) if you suspect low pressure at the edges.
-
Cooling and Peel: Let the piece cool if the instructions say cold-peel. Or peel immediately if it’s a hot-peel film. The wrong peel method can cause blurring or smudging. For example, on a metal plaque I did, peeling too early caused a faded spot – learned that the hard way!
-
Coatings and Finish: For any wood or porous item, consider a light sealant (clear acrylic spray) after transfer. It protects the DTF layer and makes it feel more like part of the surface. On plastic items, a laminating spray can help.
-
Experiment on Scraps: Before your big project, test on sample scraps of the same material. Try slightly different temps or press times and see what sticks best. This small step can save a panic later when you realize the first mug came out half-peeled.
DTF on hard surfaces is half science, half art. Expect a learning curve, but once you nail the process on one material (say, MDF wood), you’ll see patterns in how to adjust for others.

Wrapping Up
DTF Printing on Hard Surfaces: Techniques and Tips isn’t magic – it’s about understanding materials, fine-tuning your press, and using the right products. Whether you’re a hobbyist crafters or a pro shop, adding DTF capabilities means new creative doors. Imagine making a custom wooden family sign, a metal nameplate with a logo, or themed ceramic coasters – all with your designs. The strategies covered here – from selecting an STS XPD-724 DTF Printer to choosing Mimaki DTF 440ml Ink Cartridges, prepping surfaces, and nailing that heat press temperature – will set you on the right path.
Ready to experiment? Gather your supplies, clear a workspace, and don’t be afraid to try different combinations. And remember: even if a transfer doesn’t come out perfect the first time, you’ve still got a unique handcrafted item (just maybe with the vinyl peeled off). With these techniques and tips in your toolkit, DTF printing can be as versatile as your imagination.
Meta Description: Learn how to master DTF Printing on Hard Surfaces: Techniques and Tips for applying vibrant direct-to-film prints to wood, ceramic, metal, glass and more. Discover tools, prep steps, and pressing settings for durable, professional results.