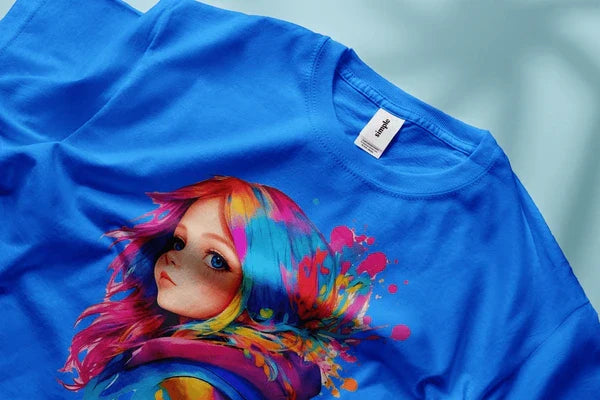
Direct‑to‑film (DTF) printing has become a go‑to method for hobbyists, small businesses and established brands because it can put striking, durable designs on almost any fabric. This process involves printing your design onto a clear film, coating it with adhesive powder, curing it, and then pressing it onto the garment. Compared with screen printing, which requires separate screens for each color, or direct‑to‑garment (DTG) printing, which needs pre‑treated fabrics, DTF is straightforward and versatile. In this comprehensive guide I’ll walk you through how to get started, from choosing the right materials to pressing a professional‑quality transfer.
Understanding the Direct‑to‑Film Printing Process
At its core, DTF printing is about creating a transfer that you later bond to the garment with heat. You start by preparing a PET (polyethylene terephthalate) film and printing your image onto it. Modern DTF printers first lay down the colored design, then print an opaque white layer over the artwork to ensure opacity on dark fabrics. Immediately afterwards, you sprinkle a fine adhesive powder onto the wet ink; this powder sticks to the ink and will act as your glue. Once any excess powder is removed, the film is heated in a curing oven or under a hovering heat press until the powder melts and bonds to the ink. Now the film is ready to be pressed onto fabric. Because the design sits on top of the garment rather than sinking into the fibers, DTF transfers produce vivid colors and crisp details on cotton, polyester, blends and even nylon.
How do I print my own DTF transfers?
Printing your own DTF transfers at home isn’t as intimidating as it sounds. Start by creating or buying a design in high resolution—vector files or 300 DPI images ensure that details remain sharp when printed. Open your design in your RIP (Raster Image Processor) software, mirror the image (so it transfers correctly), and send it to your DTF printer. The printer will lay down the color layer followed by a white underbase. While the ink is still wet, sprinkle adhesive powder across the entire printed area. Gently shake off any excess so that only the inked areas hold powder. Cure the powder with a low‑heat oven or by hovering a heat press until the powder melts into the ink. After curing, position the film face‑down on your garment, press with medium pressure at around 320 °F (160 °C) for 15–20 seconds, and allow it to cool. Peel away the film slowly; a quick post‑press of a few seconds will improve durability. The result is a vivid, professional transfer that feels soft and lasts through many washes.
What equipment is needed for DTF printing?
To print DTF transfers you need several key items:
-
DTF printer: A printer adapted for DTF with special print heads that handle water‑based pigment inks. Standard desktop printers will not work without modification.
-
DTF inks: These pigment inks are formulated for vibrant colors and elasticity.
-
PET transfer film: A heat‑resistant, anti‑static film that accepts the ink and releases it during pressing.
-
Hot melt adhesive powder: Finely ground resin that adheres the ink to fabric.
-
Heat press or curing oven: For melting the adhesive powder and transferring the design.
-
RIP software: To manage color profiles, image placement, and print order.
It’s also wise to set aside a clean, well‑ventilated area for handling the adhesive powder, as it can be messy. Many new printers come bundled with starter kits, but you can source high‑quality DTF Supplies, MIMAKI INKS, and Mutoh Inks for consistent results.

Designing Artwork for How do I print my own DTF?
A great transfer begins with thoughtful artwork. Use vector‑based software or high‑resolution raster images to minimize pixelation. DTF prints vivid colors well, but they do not handle semi‑transparencies; halftones or gradients may look dotted, so it’s safer to opt for solid colors or simple gradients. Because the printer mirrors the design, remember to flip any text or directional elements before printing. Use color profiles (such as sRGB IEC61966‑2.1) for predictable results and test your design on a swatch to ensure colors translate as expected. When designing multiple images for one sheet (known as a “gang sheet”), leave enough space around each design to cut or trim them cleanly. And don’t forget to build in “bleed” around the edges of photographs or patterns so that the design fully covers the intended area.
Can I print DTF on a regular printer?

Technically, a standard inkjet or laser printer cannot handle DTF inks and films without extensive modification. The ink chemistry is different, and you need precise control over the color‑then‑white print sequence. Some hobbyists convert inexpensive Epson desktop models by adding third‑party inks, dampers and PET film feeders, but this voids warranties and can produce inconsistent prints. Dedicated DTF printers have print heads built for thick pigment inks and usually include a powder shaker and curing system for production efficiency. If you decide to modify a sublimation printer, swap out sublimation ink for DTF ink and use PET film instead of sublimation paper. For beginners, investing in a purpose‑built machine or working with a service provider may be more reliable.
Is DTF powder easy for beginners?
Adhesive powder is an essential but sometimes overlooked element of DTF printing. It’s typically a finely ground polyamide or polyurethane resin that melts at moderate temperatures. For beginners, applying the powder evenly can be challenging—too little powder leads to weak adhesion, while too much creates rough edges. After printing, immediately cover the wet design with powder and gently shake the film to move the resin across the entire image. Use a tray or bin to catch excess powder and return it to the container. A small shaker can help you achieve an even coat, but for occasional prints you can sprinkle and rock the film by hand. Most powders cure at 250–275 °F (120–135 °C), but follow your manufacturer’s recommendations for melting time and temperature. And remember: this powder sticks to everything, so designate a workspace and sweep up regularly to avoid contamination.
How do I print my own DTF? Tips and best practices
With the right tools, DTF printing is straightforward, yet a few practical tips will improve your success rate:
-
Pre‑press the garment: Moisture and wrinkles can affect adhesion. Give the blank fabric a quick 5‑second pre‑press to smooth it out and remove moisture.
-
Match time and temperature: Most transfers cure at around 320 °F (160 °C) for 15–20 seconds. Always follow your powder and ink manufacturer’s settings.
-
Medium pressure: Too much pressure can crush the design, while too little may not activate the adhesive properly. Aim for 40–60 psi on a digital press or medium‑firm pressure on a manual press.
-
Cold vs. hot peel: Some films require a hot peel (immediate removal) while others need to cool before peeling. Check your film’s instructions; hot peel often yields a softer hand, while cold peel may provide sharper detail.
-
Post‑press for longevity: After peeling, place parchment or a finishing sheet over the design and press for 5–10 seconds. This re‑melts the adhesive layer and embeds the ink into the fabric.
-
Use quality materials: Cheap inks or films can cause cracking or dull colors. Stick with reputable suppliers like DTF Supplies, MIMAKI INKS, and Mutoh Inks for consistent results.
Comparing DTF to Other Printing Methods
While DTF is versatile, it isn’t perfect for every application. Here’s a quick comparison of popular methods:
| Print Method | Ideal Fabrics & Uses | Key Limitations |
|---|---|---|
| DTF | Cotton, polyester, blends, nylon; small runs; dark fabrics | Uses PET film and powder; slightly heavier feel |
| DTG | 100 % cotton garments; photographic prints | Requires pre‑treatment; limited to light fabrics |
| Screen printing | Bulk orders; simple, solid‑color designs | Separate screens; not suited for detail |
| Sublimation | White/light polyester; all‑over designs | Only works on polyester; colors on dark fabrics appear dull |
| Embroidery | Logos and textured finishes | Expensive equipment; limited detail |
DTF stands out because it delivers vibrant, full‑color prints on almost any fabric, doesn’t require pre‑treatment, and excels at intricate details. However, the use of PET film and adhesive powder makes it less environmentally friendly, and the transfers can feel a bit heavier on lightweight fabrics. For large, single‑color runs, screen printing remains more cost‑effective; for eco‑conscious small orders, DTG with water‑based inks might be better. If you need full‑coverage designs on polyester, sublimation is the preferred choice. Understanding these trade‑offs helps you pick the right technique for each project.
Conclusion
DTF printing empowers creators to produce professional‑quality, eye‑catching designs without investing in a full print shop. By following the steps—designing high‑resolution artwork, printing on PET film, applying DTF Supplies adhesives and Mutoh Inks, curing the powder, and pressing the transfer—you can put any image onto cotton, polyester or blends and achieve a durable finish. While there is a learning curve—particularly with powder application—the process is accessible with the right equipment and a bit of practice. For a more detailed walkthrough, check out the Step-by-Step DTF Printing Tutorial for Custom T-Shirts. As DTF technology evolves, expect even more options for inks and films, including eco‑friendlier powders and color profiles. In the meantime, start experimenting with your own prints—your creativity is the only limit.